Mead is the oldest alcoholic beverage known to man and is believed to have its origins in Asia, some 7,000 years ago. Probably discovered by accident, mead soon spread to other parts of the world and is known to have been consumed by the Ancient Greeks, Romans, Mayans and of course the Vikings.
Early civilisations viewed mead production as a mystical process, and the Ancient Greeks referred to Mead as Ambrosia, the nectar of the Gods. During the Middle Ages, in addition to forming an essential part of the diet, mead was also used in religious ceremonies.
The Vikings were both traders and warriors and, as they set off around Europe, they loaded their boats with barrels of honey mead to give them energy during their long journey. Mead, or honey wine, was an essential source of calories and, thanks to the high alcoholic content, didn’t spoil during long sea voyages.
In addition to being one of the oldest alcoholic drinks known to humanity, Viking Mead is also one of the easiest drinks to brew at home.
Easy Viking Mead Recipe
Unpasteurised natural honey contains wild yeast and Vikings created mead by mixing honey with spring water and leaving it to ferment for several months.
In our easy Viking Mead recipe, we use cultivated mead yeast. This has the advantage of fermenting faster and producing more consistent results.
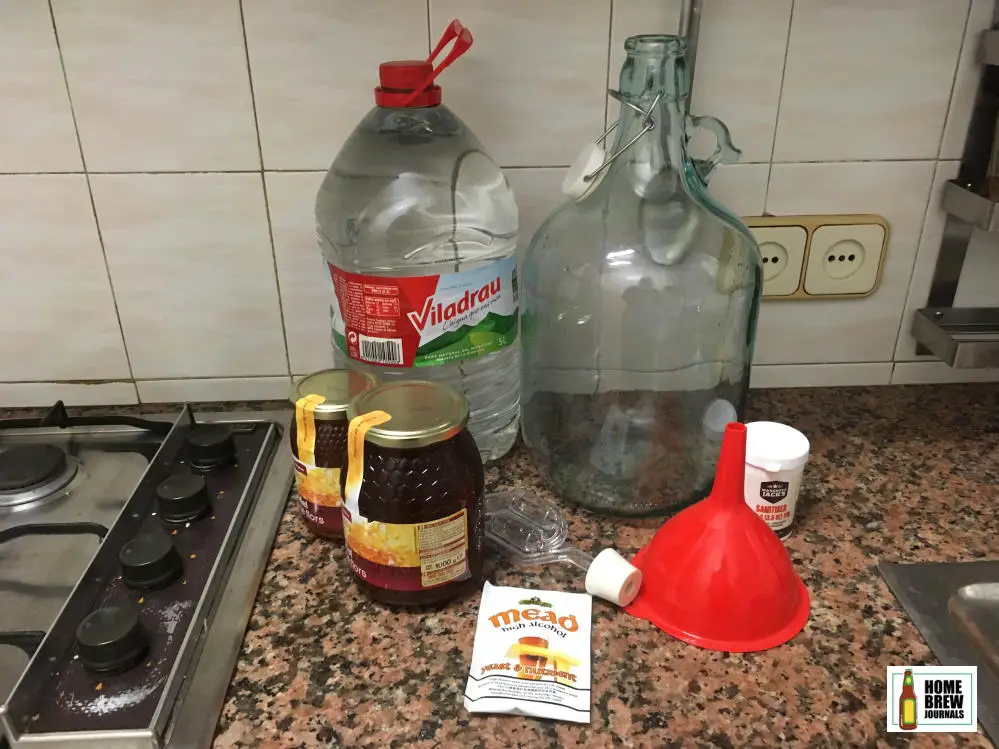
Ingredients
- 4.5 litres (4.5 quarts) of bottled water
- 1.4 kg (3 lbs) of pure honey
- Half a packet of mead yeast
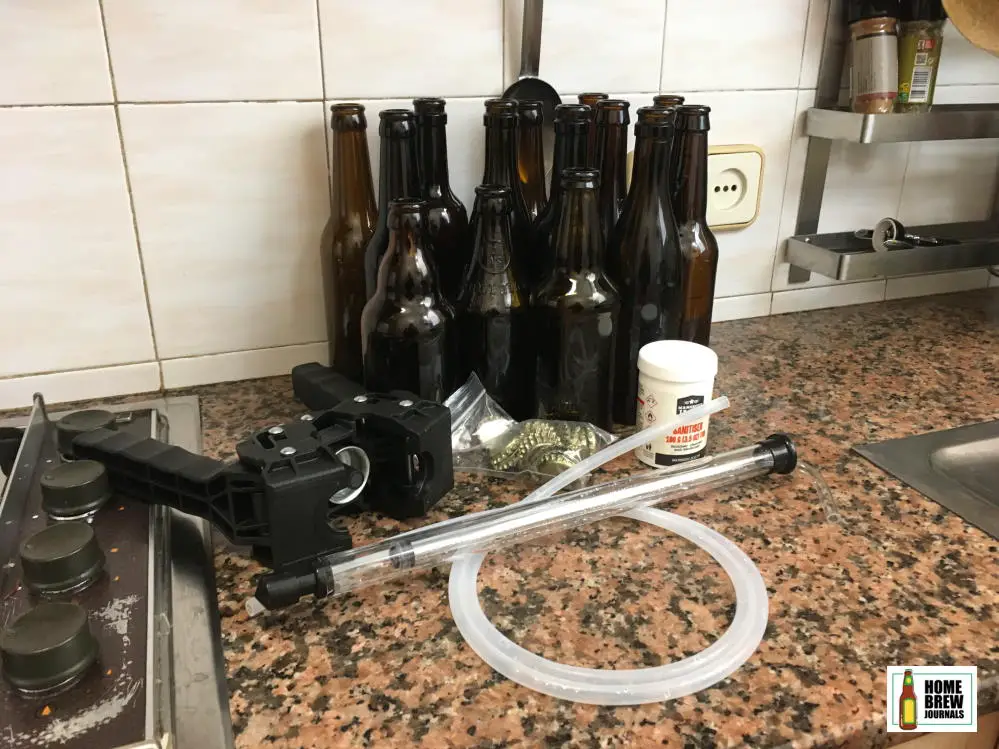
Equipment
- 5-litre (1 gallon) jug or carboy
- Small funnel
- Airlock & stopper
- Thermometer
- No-rinse sanitiser
- Siphon or auto-siphon
- 12 swing top glass bottles
You can adapt the quantities in this recipe to match the capacity of your demijohn or carboy. I use a five litre glass carboy which is large enough to make four and a half litres of mead.
For five litres of water, you should add between 1 and 1.5 kg of honey. The exact amount of honey needed depends on the alcohol tolerance of your yeast and how sweet you want your mead to taste. If you are using mead yeast, 1.4 kilos will achieve maximum ABV while still leaving some residual sweetness.
I use Bulldog Brews Mead Yeast which also contains yeast nutrient. If you can’t get hold of mead yeast, you could also use champagne yeast. If your chosen yeast doesn’t include nutrients, you should purchase them separately since honey doesn’t contain all the nutrients which yeast needs.
As long as it’s pure honey, you can use whichever type of honey you prefer for this recipe (check the label before purchasing). I use the best quality honey which is available at my local supermarket, but if you can get locally produced honey from a whole food store or farmers market all the better.
I bottle my mead in 33cl brown glass beer bottles with crown caps if you don’t already own a bottle capper like the one shown in the photos you can save money by using swing-top (Grolsch) bottles.
How to make Viking mead
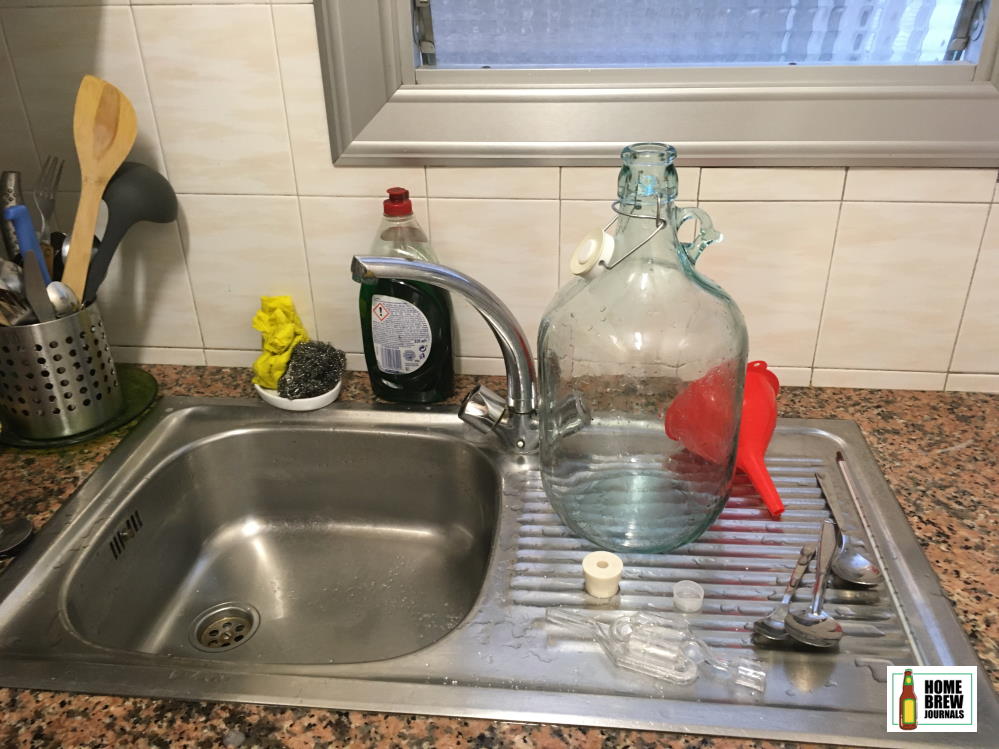
Step 1: Wash and sanitise your equipment
Sanitation is one of the most important aspects of home brewing. If you don’t thoroughly clean everything that comes into contact with the mead, you run the risk that unwanted bacteria may ruin it.
The first step is to wash the fermenting vessel, thermometer and funnel thoroughly in soapy water, rinse them thoroughly and leave them to dry. Washing removes any dirt, but it doesn’t kill bacteria.
Next, you should mix up a bowl full of no-rinse sanitiser following the instructions on the packet. Popular makes include Star San, Oxipron and Chemipro, all of which are tasteless and disinfect using oxygen. Exact instructions vary, but as a rough guide, you need to immerse the equipment in sanitiser for ten minutes before shaking off the excess moisture. They are now ready to use straight away.

Step 2: Warm the honey and water
I recommend that you use unopened jars of honey and an unopened bottle of spring water (or filtered water). The use of sealed jars and bottles ensures that there are no unwanted bugs in the ingredients.
Place the jar(s) of honey and the bottle of water in a bowl and fill with hot water to just below the top of the jars.
Leave them to warm up for about half an hour. This step ensures that the honey is as runny as possible and helps the ingredients mix together as smoothly as possible during the next step.
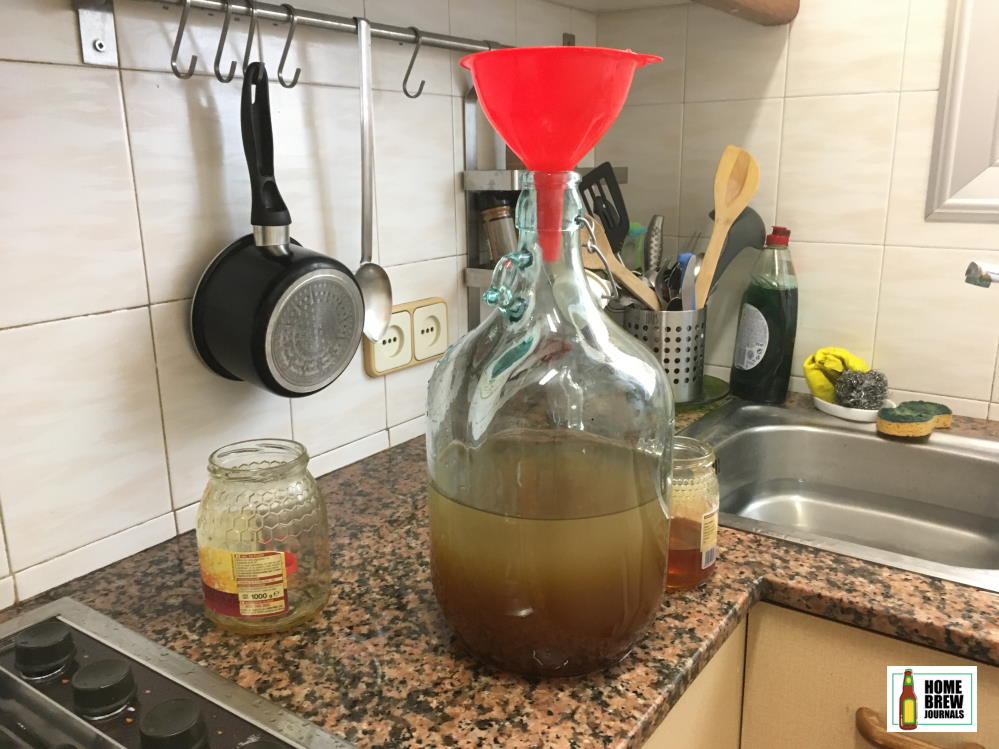
Step 3: Thoroughly mix the water and honey
Half fill the fermenter with spring water before adding the honey with the aid of the funnel. Once all the honey is in the fermenter, put the cap on and shake vigorously for about ten minutes until it is thoroughly mixed.
Shaking the carboy like this both mixes the honey into the water and adds oxygen. This is important since yeast needs oxygen to grow during the early stages of fermentation.
Step 4: Top the fermenter up with water
Once the mixture is thoroughly mixed and aerated, you should top up the fermenter with water. Don’t fill the fermenter completely; there should be approximately ten per cent of empty space at the top of the fermenter to allow a layer of bubbles to form during fermentation.
Once you have topped up the water, you should shake it for a couple more minutes again to create a homogeneous mixture.
Use your sanitised thermometer to check the temperature of the honey and water mix. Depending on the temperature of the water bath, it may be too hot for pitching the yeast. If so, wait until it cools down to the temperature range marked on the packet of yeast (normally around 25ºC or 77ºFarenheit).
Step 5: Add the yeast
Next, we open the packet of mead yeast and pour approximately half the contents into the fermenter.
You don’t need to be too accurate with the quantity of yeast used since, in theory, one packet is sufficient to ferment twenty litres of mead. Note: if you aren’t using the same type of yeast which I recommended at the start of this post, you should also add yeast nutrients at this stage.
Put the stopper back on the fermenter and, you guessed it, shake it again to mix the yeast with the water and honey.

Step 6: Fit the airlock and leave to ferment
Once the yeast has mixed in, seal the top of the carboy with a rubber bung and fit the airlock. Top the airlock up with water or sanitiser and leave the carboy in a dark place to ferment for five weeks.
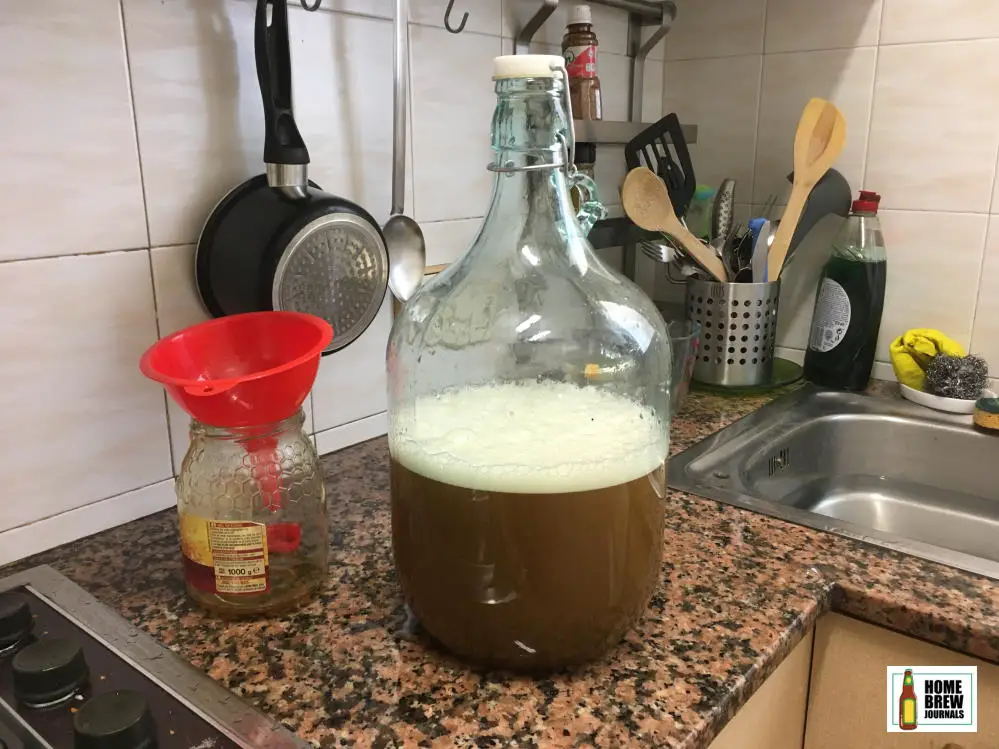
A few hours after you pitched the yeast, you should start to see tiny bubbles forming in the mead and passing through the airlock. This means that fermentation is taking place.
Fermentation usually lasts between seven and ten days, depending on ambient conditions and the type of yeast which you are using. After bubbles have stopped forming, the dead yeast and other particles will slowly sink to the bottom of the fermenter, forming a pale brown layer of trub.
The contents of the fermenter will slowly transform from a murky brown liquid into clear honey coloured mead.
At this point, you could drink the mead if you want to. However, the taste would be pretty fiery, a bit like cheap whisky or vodka. It’s best to siphon the mead into bottles and leave it in a cool dark place to mature for at least another month.
After this, you will find that the flavour has mellowed and any remaining yeast or particulate matter will have sunk to the bottom of the bottles.
Step 7: Bottling
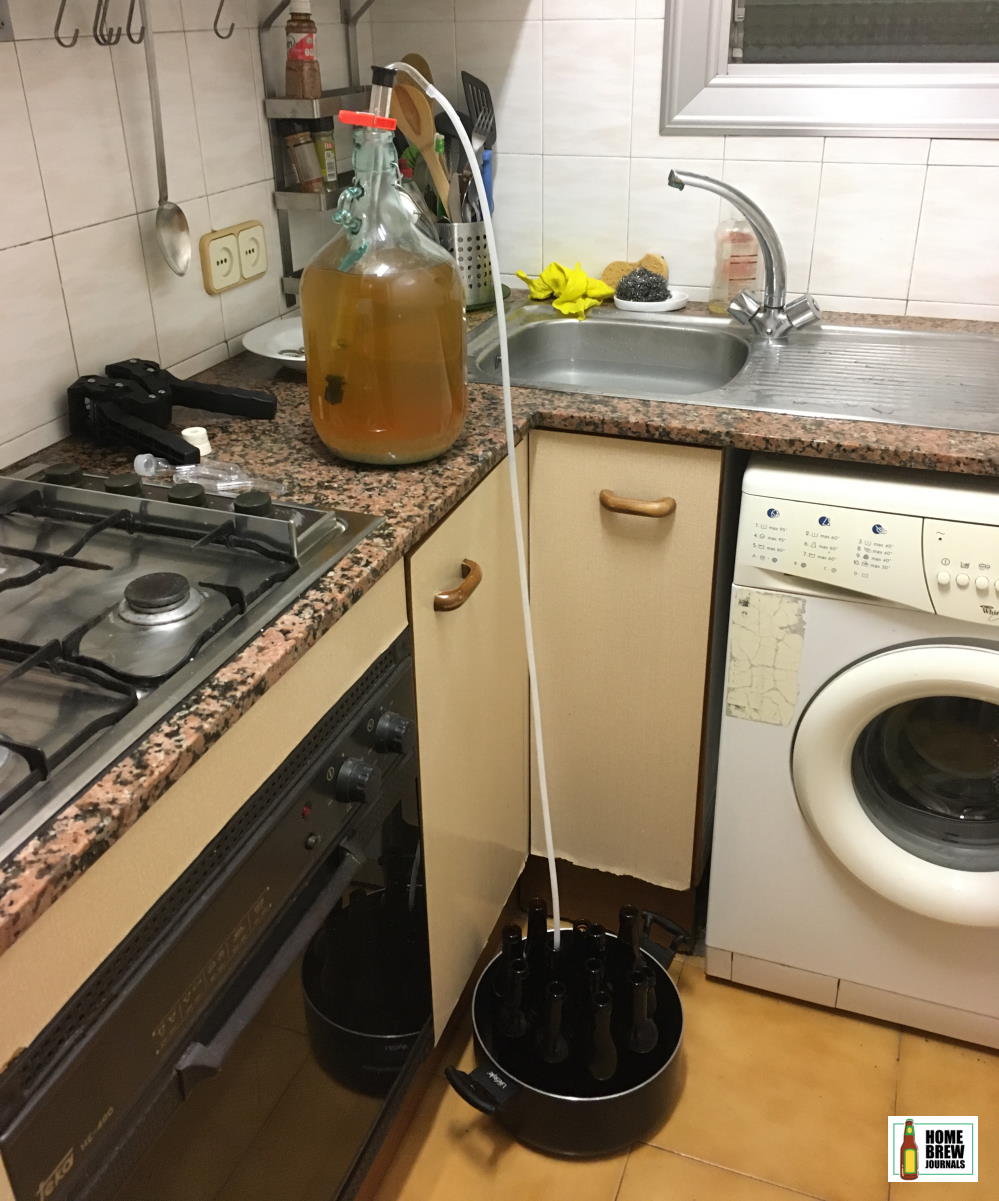
Siphons work by using gravity to transfer the liquid from one place to another, and because of this, the carboy full of mead needs to be higher than the bottles.
I usually move the fermenter into the kitchen the night before I will be bottling and place it on the work surface. This allows any residue which has been disturbed to settle down to the bottom of the carboy. Wrap the carboy with a towel to prevent it from being exposed to the light, which may cause off flavours.
Wash and sanitise twelve swing top bottles and your auto-siphon as before. Leave the bottles to drain for a few minutes standing upside down on a clean tea towel on the work surface until most of the sanitiser has drained out.
Place the bottles in a large saucepan on the floor in front of the fermenting vessel, as shown in the photo.
Remove the airlock and bung and slowly lower the auto-siphon into the carboy until it is a few centimetres above the layer of trub. Fix it in place with a clip or clean plastic clothes peg.
As the level of the mead drops, you should slowly lower the end of the auto-siphon down, taking care not to disturb the trub (yeast residue). I usually expect to leave two to three centimetres of liquid in the fermenter.
Lower the other end of the siphon tube into one of the bottles until it touches the bottom. Pump the auto-siphon twice to start the flow of mead into the bottle.
By placing inserting the tube right to the bottom of the bottle, you ensure that the mead fills the bottle without splashing.
When you see that the mead is almost level with the top of the bottle, pinch the tube closed before removing it from the bottle and placing it in the next one. This should leave approximately two centimetres (an inch) of empty space at the top of the bottle. Continue until you have filled all the bottles.
If you haven’t used an auto-siphon before I recommend that you practice siphoning water from the kitchen sink into a saucepan beforehand. They’re not hard to use, but there is a knack to starting the siphon.
You should expect there to be a layer of light brown trub and about two centimetres (one inch) of mead left in the bottom of the fermenter.
Cap the bottles and leave them in a cool dark place for a month or more to mature.
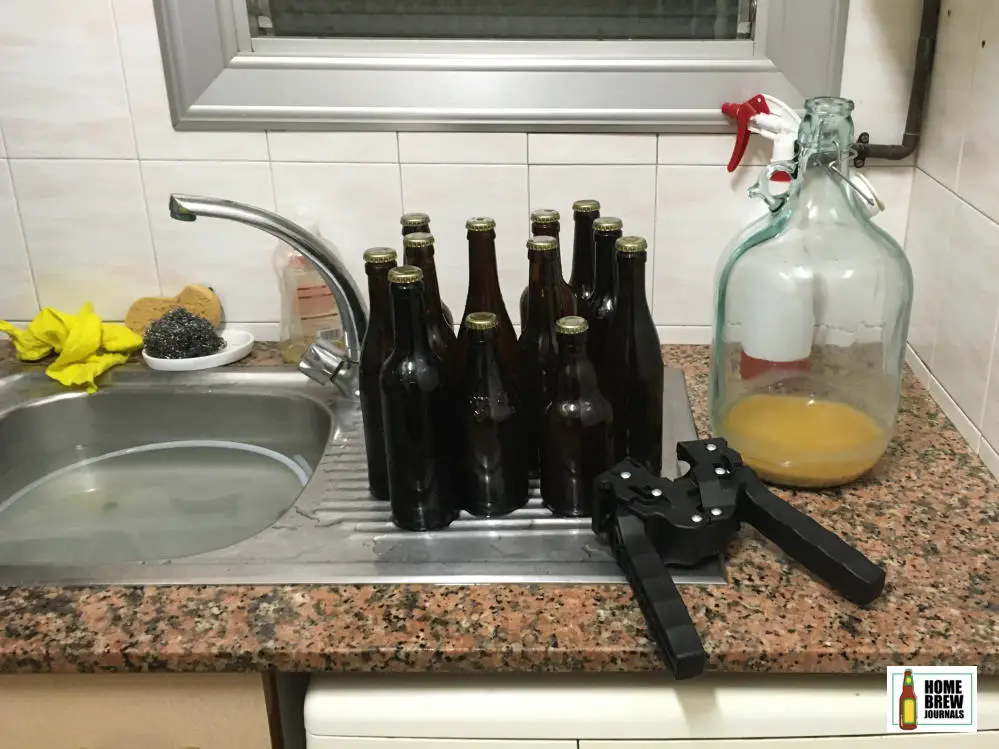
Step 8: Drink and enjoy
A month after bottling, your Viking mead is ready to enjoy.
If you tried some of the mead before you bottled it, you would notice that it has mellowed out and now tastes less alcoholic than before. Beware though, if you used mead yeast and the same quantity of honey as in the recipe it will be slightly stronger than wine, around 15% ABV.
Please drink responsibly, or you could end up with one hell of a Viking hangover!
