Once you’ve got your first couple of batches of homebrew under your belt, it’s time to start measuring the alcohol content of your beer.
Not only is it good to know just how strong your beer is. It also helps you improve your brewing technique and, with practice, will help you consistently brew better beer.
Most homebrewers measure alcohol content using a simple tool called a hydrometer which measures the density of liquids.
During the fermentation process, yeast converts sugars into alcohol. As the sugar is used up, the wort slowly becomes less dense. By measuring the density before and after fermentation, you can calculate how much alcohol is in the finished beer.
In this post, we look at how hydrometers work and how you can use one to calculate the alcohol content of your beer.
We also share some tips and a couple of online tools that will help make the calculations easier.
Fermentation 101
Brewer’s yeast (Latin name: Saccharomyces cerevisiae) is a single-celled microorganism, similar to bacteria, which grows by converting sugar into alcohol and Carbon Dioxide. The process of converting sugar into alcohol plus CO2 is called fermentation and is a key part of brewing beer and wine.
Early brewers used naturally occurring yeasts that are present in the environment. Modern-day brewers use specially developed strains of yeast which give far better and more predictable results.
In the first stages of brewing, sugars are steeped out of malted barley in a process called mashing. This creates a solution called wort which contains a mixture of fermentable and non-fermentable sugars.
Hops are then added to the wort which is then boiled for about an hour. This both extracts oils from the hops and concentrates the amount of sugar in the solution by evaporation.
Once the wort has cooled down to pitching temperature, normally between 18 and 24ºC (64 to 75ºF), it’s poured into a fermentation vessel, and yeast is added.
After a few days fermentation slows down and finally stops. Exactly how long this takes depends on factors like; ambient temperature, type of yeast used and the concentration of fermentable sugars.
Specific gravity, OG, FG and ABV
As mentioned at the start of this post, you can calculate the alcohol content of beer or wine by measuring the density of the wort before and after fermentation.
The density of liquids is measured using a scale called Specific Gravity. The density of distilled water is 1.000.
Liquids which are denser than water have a Specific Gravity that is greater than 1.000.
Unfermented wort typically has a Specific Gravity of around 1.055. This value is called the Original Gravity (OG).
By the time that fermentation has completed, the Specific Gravity will have dropped to around 1.010. This is called the Final Gravity (FG).
By subtracting the Final Gravity from the Original Gravity, we can calculate the alcohol content of our beer using the formula below.
ABV = (OG – FG) x 131.25
Although this formula is easy to remember, it’s not entirely accurate. The calculator below uses a slightly more complicated version which gives better results.
ABV = (76.08*(OG-FG)/(1.775-OG))*(FG/0.794)
ABV stands for Alcohol by Volume.
Although this formula is simple, it’s not so easy to work out in your head, so I’ve created this online calculator to do it for you.
What is a Hydrometer?
A hydrometer is a glass float, like a fishing float, that is used to measure the density of liquids.
At one end of the hydrometer, there is a weight that makes it float vertically. The depth that it sinks to depends on the density of the liquid which it is floating in. The denser the liquid, the higher it floats.
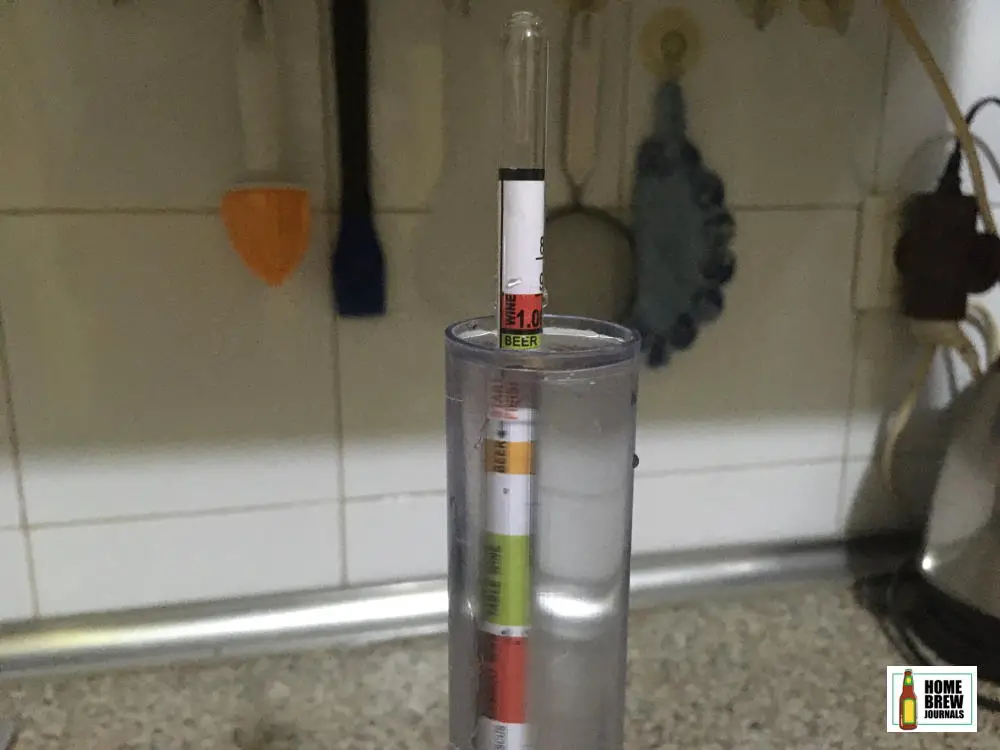
The other end of the hydrometer is a narrow glass tube with a rolled-up piece of paper inside it that usually has three different scales printed on it: Specific Gravity, Brix and Potential Alcohol.
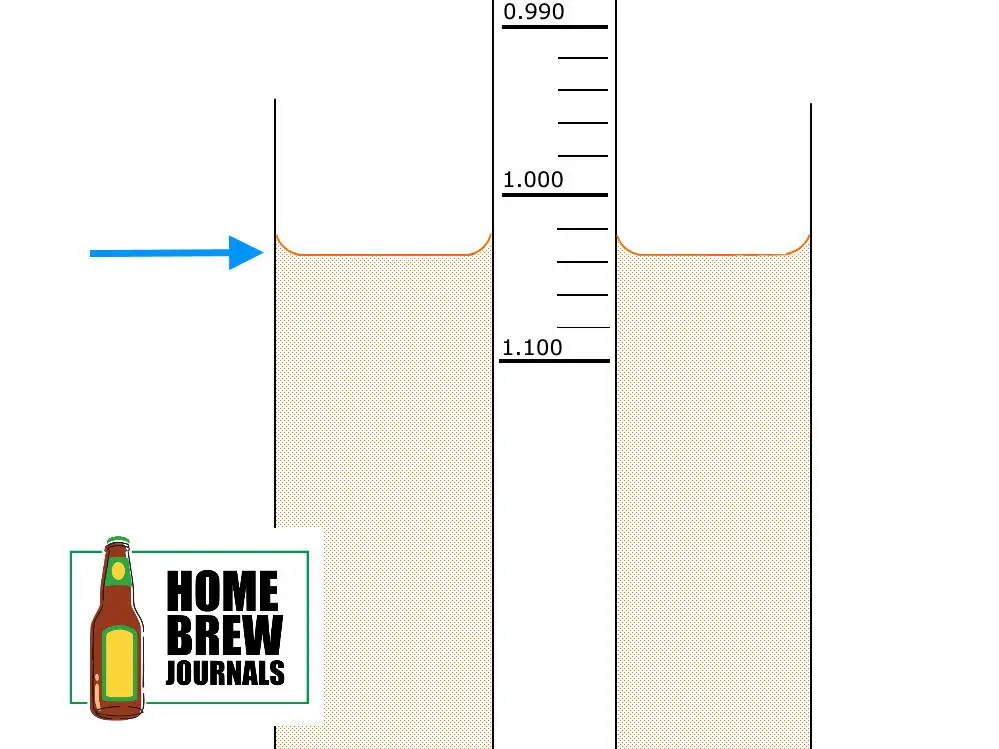
The scale that we are interested in is Specific Gravity. To take a measurement, you read the point that the surface of the liquid comes up to on the glass tube, as shown in the diagram below.
You can purchase a glass hydrometer like the one in the photos from homebrew stores and online. Check prices and availability on Amazon >>
How to Use a Hydrometer
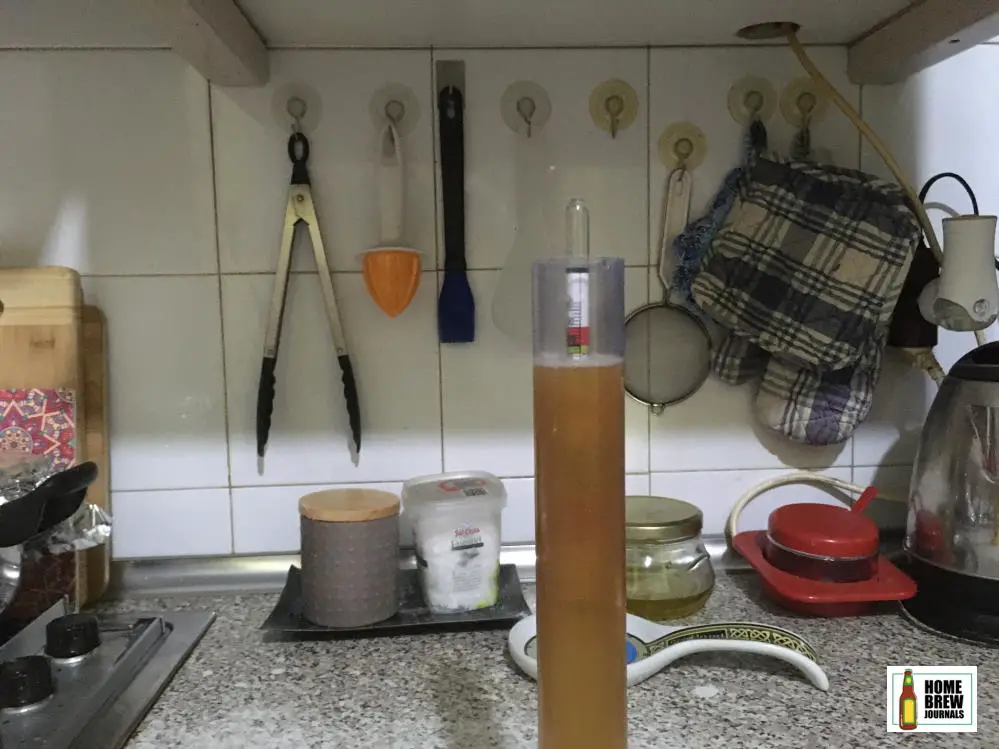
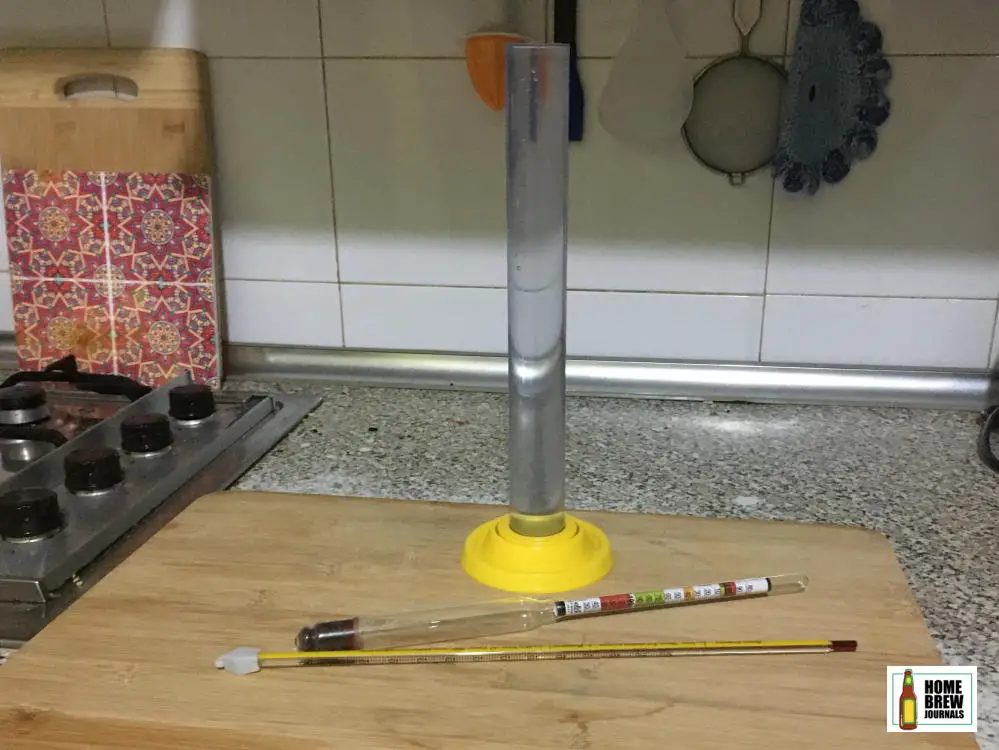
- Take a sample of wort from your fermentation vessel and fill the test tube approximately three-quarters of the way to the top. There needs to be enough liquid in the tube for the hydrometer to float without touching the bottom, but not so much that it overflows when the hydrometer is added.
- Measure the temperature of the wort in the test tube using a thermometer.
- Slowly lower the hydrometer into the wort and give it a gentle spin to release any bubbles that may have stuck to it.
- Once the hydrometer has stopped spinning, take a gravity reading as shown in the diagram below. Make sure that the hydrometer isn’t touching the sides or bottom of the test tube.
- Use the online calculator below to correct the specific gravity reading for temperature. The density of liquids varies with temperature. Most hydrometers are calibrated at 20ºC (68ºF), and if the liquid you are measuring isn’t at exactly the same temperature, you will need to adjust the reading. The temperature which your hydrometer was calibrated at should be written on the piece of paper inside the hydrometer.
- Once you are happy that you have measured the specific gravity correctly, carefully clean and dry your hydrometer before putting it back in its box.
How to read a Hydrometer correctly
When water is in contact with glass surfaces, it curves upwards slightly because the water molecules adhere to the glass. The upwards curve is called a meniscus.
In most cases, you should read the number shown at the bottom of the meniscus. However, there are exceptions so you should check the instructions which came with your hydrometer to make sure.
How to take a hydrometer sample
The easiest way to mess up a batch of beer is by poor sanitization. Everything which comes into contact with the wort after it has been boiled must be properly cleaned and sanitized. If not, you could introduce bacteria into your brew and make it undrinkable.
Because of this, you must not (or at least shouldn’t) place your hydrometer directly into the fermentation vessel. Instead, you should take a small sample in a test tube which is large enough to float the hydrometer. Most good hydrometers come complete with a suitable test tube.
If you brew in a glass carboy, then you can take a sample using a (thoroughly sanitized) wine thief or turkey baster. If you use a plastic or stainless-steel fermentation bucket, you can simply open the spigot (tap) and run a sample directly into the test tube.
Can I pour the sample back into the fermenter?
This is a question that comes up a lot, and there are two distinct schools of thought.
Some homebrewers say that as long as you thoroughly sanitize everything, there’s no reason why you shouldn’t return the hydrometer sample into the main batch after taking a reading.
The other school of thought is that it’s not worth the risk of infecting and therefore wasting an entire batch of beer.
I fall into the second category and never pour the sample back. I still sanitize everything, but I never pour the sample back into the fermenter. Personally, I like to taste the sample to see how the brew is progressing. I think you can learn a lot by tasting the wort at different stages of the brewing process.
Even if you won’t be pouring the sample back into the fermentation vessel. You must still clean and sanitize your wine thief or turkey baster.
When should I take a gravity reading?
So far we’ve looked at how you can calculate ABV by measuring OG and FG, but there are a couple of other stages in the brewing process when you might want to measure specific gravity.
Before boiling the wort and adding hops
During mashing, the starch in the malted barley is converted into sugar and dissolved in water creating wort. Exactly how much sugar is extracted depends on several factors including the type and quantity of grains used, mash temperature and the equipment and techniques used by the brewer.
By measuring the gravity before boiling the wort, you can calculate the brewing efficiency of your setup. You can also adjust the sugar content of the wort if necessary either by adding malt extract if the gravity is too low or by adding extra water if it is too high.
During the boil between ten and twenty per cent of the water will be evaporated off, raising the specific gravity reading by around five points. The unboiled wort typically has a specific gravity of about 1.050.
During fermentation, to see how things are progressing
Primary fermentation usually takes between a week and ten days and many homebrewers wait until they know that fermentation has completed before taking a reading to check that they have hit the target gravity. If the specific gravity is as expected, they go ahead and bottle or keg the beer.
This is OK, but there are occasions when fermentation can take longer than usual and may get stuck before all the fermentable sugars are used up. To be on the safe side, it’s a good idea to check the specific gravity after seven days and then every two days after that until you get two successive measurements which are the same.
Do I really need to measure alcohol content?
If you’re a newbie homebrewer, you may be asking yourself whether you really need to measure how much alcohol is in your beer.
Personally, I think it’s best not to worry about taking gravity readings for your first couple of batches. If you are brewing all-grain, there are plenty of other things to concentrate on and it’s best to keep things as simple as possible.
As long as you are following a proven recipe, your beer will still taste great and the exact alcohol content isn’t important at this stage. You can check when fermentation has finished by watching the airlock and waiting for the layer of krausen to subside. You should leave your beer in the fermenter until at least three days after the airlock stopped bubbling. Or better still, leave your beer in the fermenter for two weeks to be on the safe side.
It’s worth bearing in mind that the two samples used for measuring specific gravity are the equivalent of one whole bottle of beer. This may be insignificant when you are brewing 5-gallon batches. But if you are only brewing five litres (one gallon) of beer, that’s one less beer that you get to enjoy.