Fermentation is the most critical step in the brewing process when yeast turns the sugar in the wort into alcohol and carbon dioxide. Depending on the type of yeast used, the concentration of sugar in the wort and ambient temperature, fermentation will usually take between five days and several weeks to complete.
Once fermentation stops, it’s time to transfer your beer or wine into bottles or a keg, or if you are dry hopping, you may want to rack it into a secondary fermenter for a few days. But how do you know when fermentation is complete?
The only way to be sure that fermentation has completed is by measuring the specific gravity. Ten days after pitching the yeast, you should take a sample of beer from the fermenter and measure the gravity. You then take another reading two days later, if both readings are the same fermentation has stopped.
Several other signs can indicate whether fermentation is taking place. In this post, we take a look at what happens during fermentation and how you can decide when fermentation has completed, and it’s time to bottle or keg your beer.
What is fermentation?
Yeast is a single-celled micro-organism similar to fungus that consumes the sugar in the wort producing alcohol and carbon dioxide in a process called fermentation.
Assuming that you pitched enough healthy yeast, and the wort is at the correct temperature, the first signs of fermentation will appear within twenty-four hours. Fermentation will then continue vigorously for around four days before slowing down and finally stopping.
After this, you should leave the beer in the primary fermenter until the yeast has had time to clear up unwanted by-products and settle to the bottom of the fermenter. You then transfer the beer to bottles or a keg where it becomes carbonated ready to serve.
The amount of time needed for fermentation depends on the type of yeast used, the sugar content in the wort and ambient temperature.
The timescales mentioned in this post refer to ales that are made using top-fermenting yeasts that ferment near the surface of the wort before sinking to the bottom of the fermentation vessel.
Lagers are brewed using bottom-fermenting yeast which takes slightly longer. Belgian ale yeasts, mead, and cider fermented using wild yeast ferment more slowly and fermentation may take several weeks to complete.
You can reduce the time that the fermentation takes to get started by using a yeast starter and pitching active yeast.
Visual signs of fermentation
1. Bubbles of CO2 forming in the wort
After adding the yeast, the individual yeast cells are suspended in the wort and soon start to grow and multiply, using up the absorbed oxygen. It then starts metabolising the sugar in the wort producing alcohol and carbon dioxide gas.
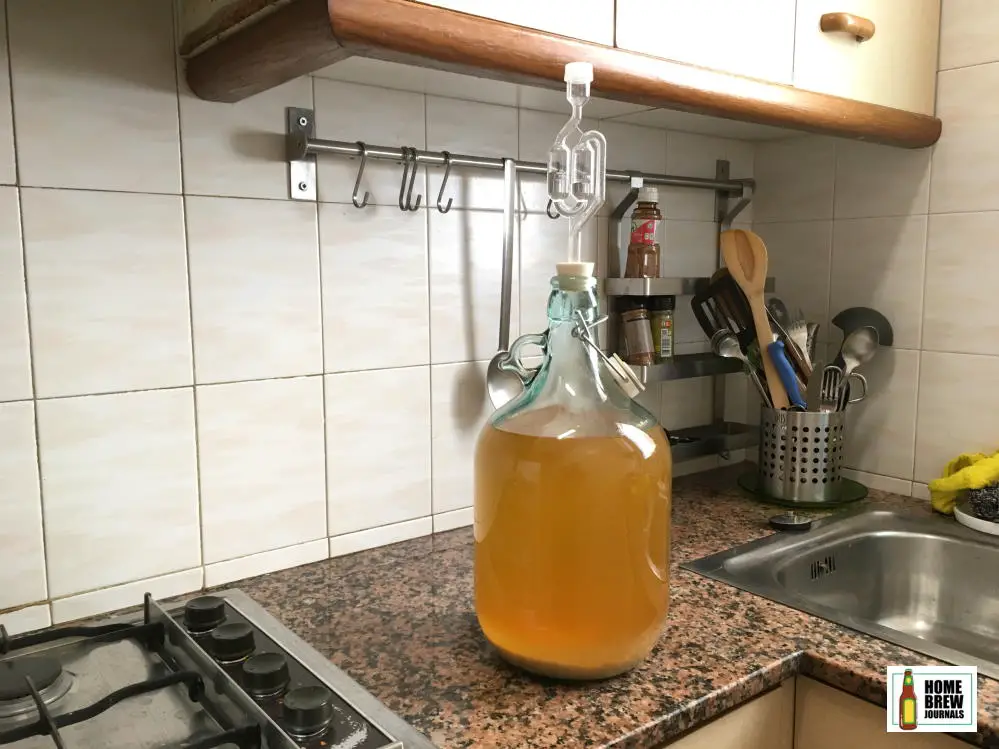
If you are using a glass carboy or transparent PET fermenter, you should start to see ting bubbles of CO2 gas forming in the wort after a few hours. The tiny bubbles of gas then float up through the wort to the top of the fermenter.
2. The airlock, bubbles and levels
The gas generated by fermentation causes the pressure inside the fermenter to slowly increase. When the pressure inside the fermenter is higher than the ambient pressure outside, the CO2 gas escapes through the airlock as bubbles.
In the early, most vigorous stages of fermentation, bubbles may stream almost continuously through the airlock. After a few days, as fermentation slows down, the bubbles will become less and less frequent until they finally stop.
It’s essential to remember that the sole purpose of an airlock is to let CO2 escape from the fermenter without allowing air in. Although a bubbling fermenter is a sign that fermentation is taking place, the fact that the airlock isn’t bubbling doesn’t necessarily mean that fermentation has stopped.
This is especially true when using plastic bucket fermenters. CO2 will always find the easiest way out of the fermenter. In theory, this should mean that it bubbles out through the airlock. In reality, the lids of plastic fermenters often don’t seal properly in which case the carbon dioxide will leak out through the top. This isn’t a problem since CO2 is heavier than air and forms a protective layer on top of the wort.
I have several plastic fermenters, one of which rarely seals completely. The first time I used it, I was concerned that fermentation wasn’t taking place since although the water was displaced slightly in the airlock, there were never any bubbles.
Since I knew that I’d pitched the correct quantity of yeast and that the temperature of the wort was about right, I waited for ten days before taking a gravity reading. As expected, the specific gravity was lower than the reading which I took before adding the yeast. I then left things alone for a few more days to finish up before taking another gravity reading and bottling the beer. Now, whenever I use that bucket, I no longer worry when the airlock doesn’t bubble.
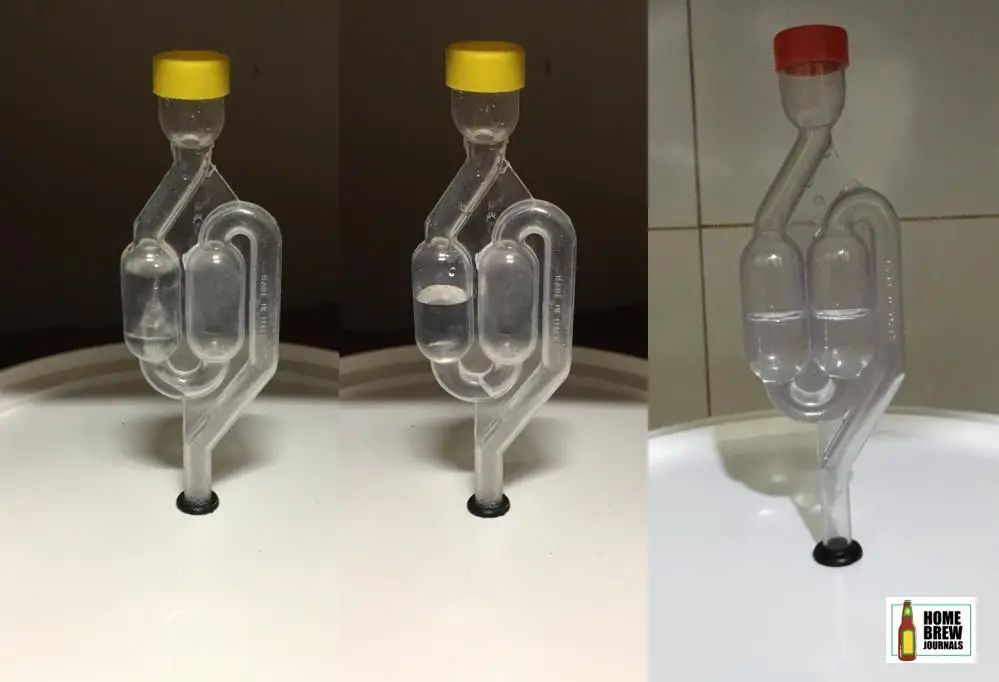
If you are using an S-shaped airlock, you will see that, before it starts bubbling, all the water in the airlock gets pushed around to one side indicating that the pressure inside the fermenter is higher than the pressure outside. There are then typically several days during when carbon dioxide escapes as bubbles.
Once the bubbling has stopped, there will be a period when the water remains in one side of the airlock before finally settling back to the original position with half the water in each side of the s-bend. If the water level in the two sides of the s-bend isn’t equal, you can be reasonably sure that fermentation is still taking place, albeit slowly.
You can find out more about airlocks in this post >>
3. Krausen forms and then falls
During fermentation a foamy layer of krausen forms on top of the wort. The krausen protects the beer from infection and can be used to judge when fermentation comes to an end.
Krausen is made up of yeast cells, proteins from the wort, hop oils and other residues. It starts to form approximately twenty-four hours after you pitch the yeast when fermentation is most vigorous.
As fermentation slows down, the layer of foam subsides and finally flocculates. When fermentation is complete, the layer of krausen sinks to the bottom of the fermenting vessel, taking other undesirable by-products of fermentation with it.
The state of the krausen is a good indicator of how fermentation is progressing.
4. Yeast particles floating around in the wort
During the early stages of fermentation, when the yeast is most active, you will see small lumps of yeast swirling around in the wort, rising to the top of the carboy before sinking back down again.
5. Flocculation: yeast sinking to the bottom
As fermentation continues, the yeast slowly dies off, comes out of suspension and sinks to the bottom of the fermenter where it forms a so-called yeast cake which is a mixture of dead and inactive yeast as well as other residues.
How do you know that fermentation is complete?
Although the signs mentioned above are good indicators of how fermentation is progressing, the only way to be sure that fermentation is complete is to take specific gravity readings.
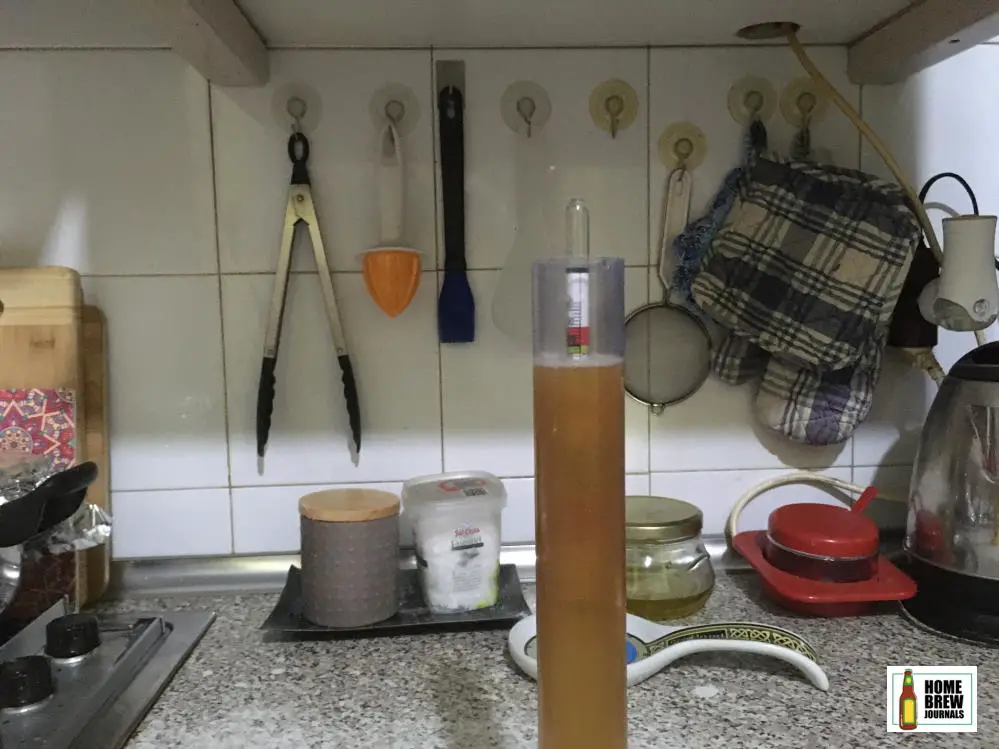
You should take the first reading before pitching the yeast; this is called the original gravity. Most, if not all, homebrew recipes include expected OG and FG readings.
Once the airlock has stopped bubbling, and the layer of krausen has fallen, it’s time to take a small sample of beer and measure the gravity. Assuming the value is lower than the reading you took before you pitched the yeast, then fermentation has taken place. If the value you measured coincides with the FG given in the recipe, all the better, you can now be pretty sure that fermentation has taken place as expected.
Two days later, you take another sample and measure the gravity. If the hydrometer reads the same value as it did previously, you know that fermentation is complete and can go ahead and keg your beer.
You might want to read my post about how to use a hydrometer >>
Stuck fermentation & how to fix it
If the measured OG value was similar to the one stated in the recipe, but the second gravity reading wasn’t as low as expected, it’s possible that fermentation either never started or perhaps stopped prematurely. This is called a stuck fermentation.
If you bottle your beer at this point, fermentation might restart when the beer is in the bottles. This could cause the bottles to blow their caps off or even explode which, apart from the mess, could be dangerous.
Fermentation didn’t take place
If there were never any bubbles in the airlock and a layer of krausen didn’t form, it’s possible that fermentation didn’t take place. Assuming that you aerated the wort and kept the fermenter at the correct temperature, it’s possible that the yeast you used was dead, or you didn’t pitch enough.
If this is the case, you should pitch more yeast, preferably from a new packet, stir it in with a thoroughly sanitised spoon and then wait twenty-four hours to see if fermentation starts.
If fermentation started but then stopped prematurely, it may be possible to restart it by either moving the fermenter to a warmer place or giving the fermenter a gentle swirl to reactivate the yeast.
If you are lucky, fermentation will start up again, and you just need to wait a few more days before taking another gravity reading.
